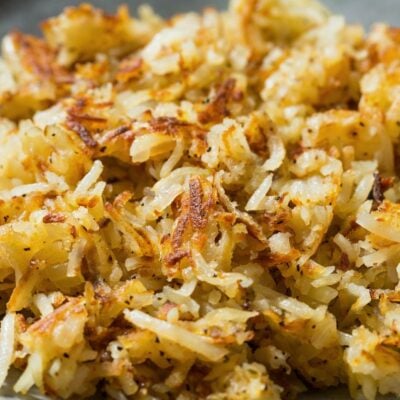
If you like the convenience of having frozen hash brown shreds but want to avoid the seed oils that are included in many brands, this simple process is for you! These homemade frozen hash browns are perfect for frying in a skillet, including in soups or breakfast casseroles!

I love skillet hash browns – they are just about one of the most Southern foods I can think of! But grating, soaking, drying, and frying potatoes first thing in the morning is rarely on my to-do list for the day!
Instead, I have been keeping large bags of homemade hash brown shreds so that I can whip up that perfect crispy hash brown goodness with a fraction of the effort required in the morning!
Serve these with a side of homemade biscuits, some cheesy eggs, and a side of fresh fruit… and you have a great day ahead of you!
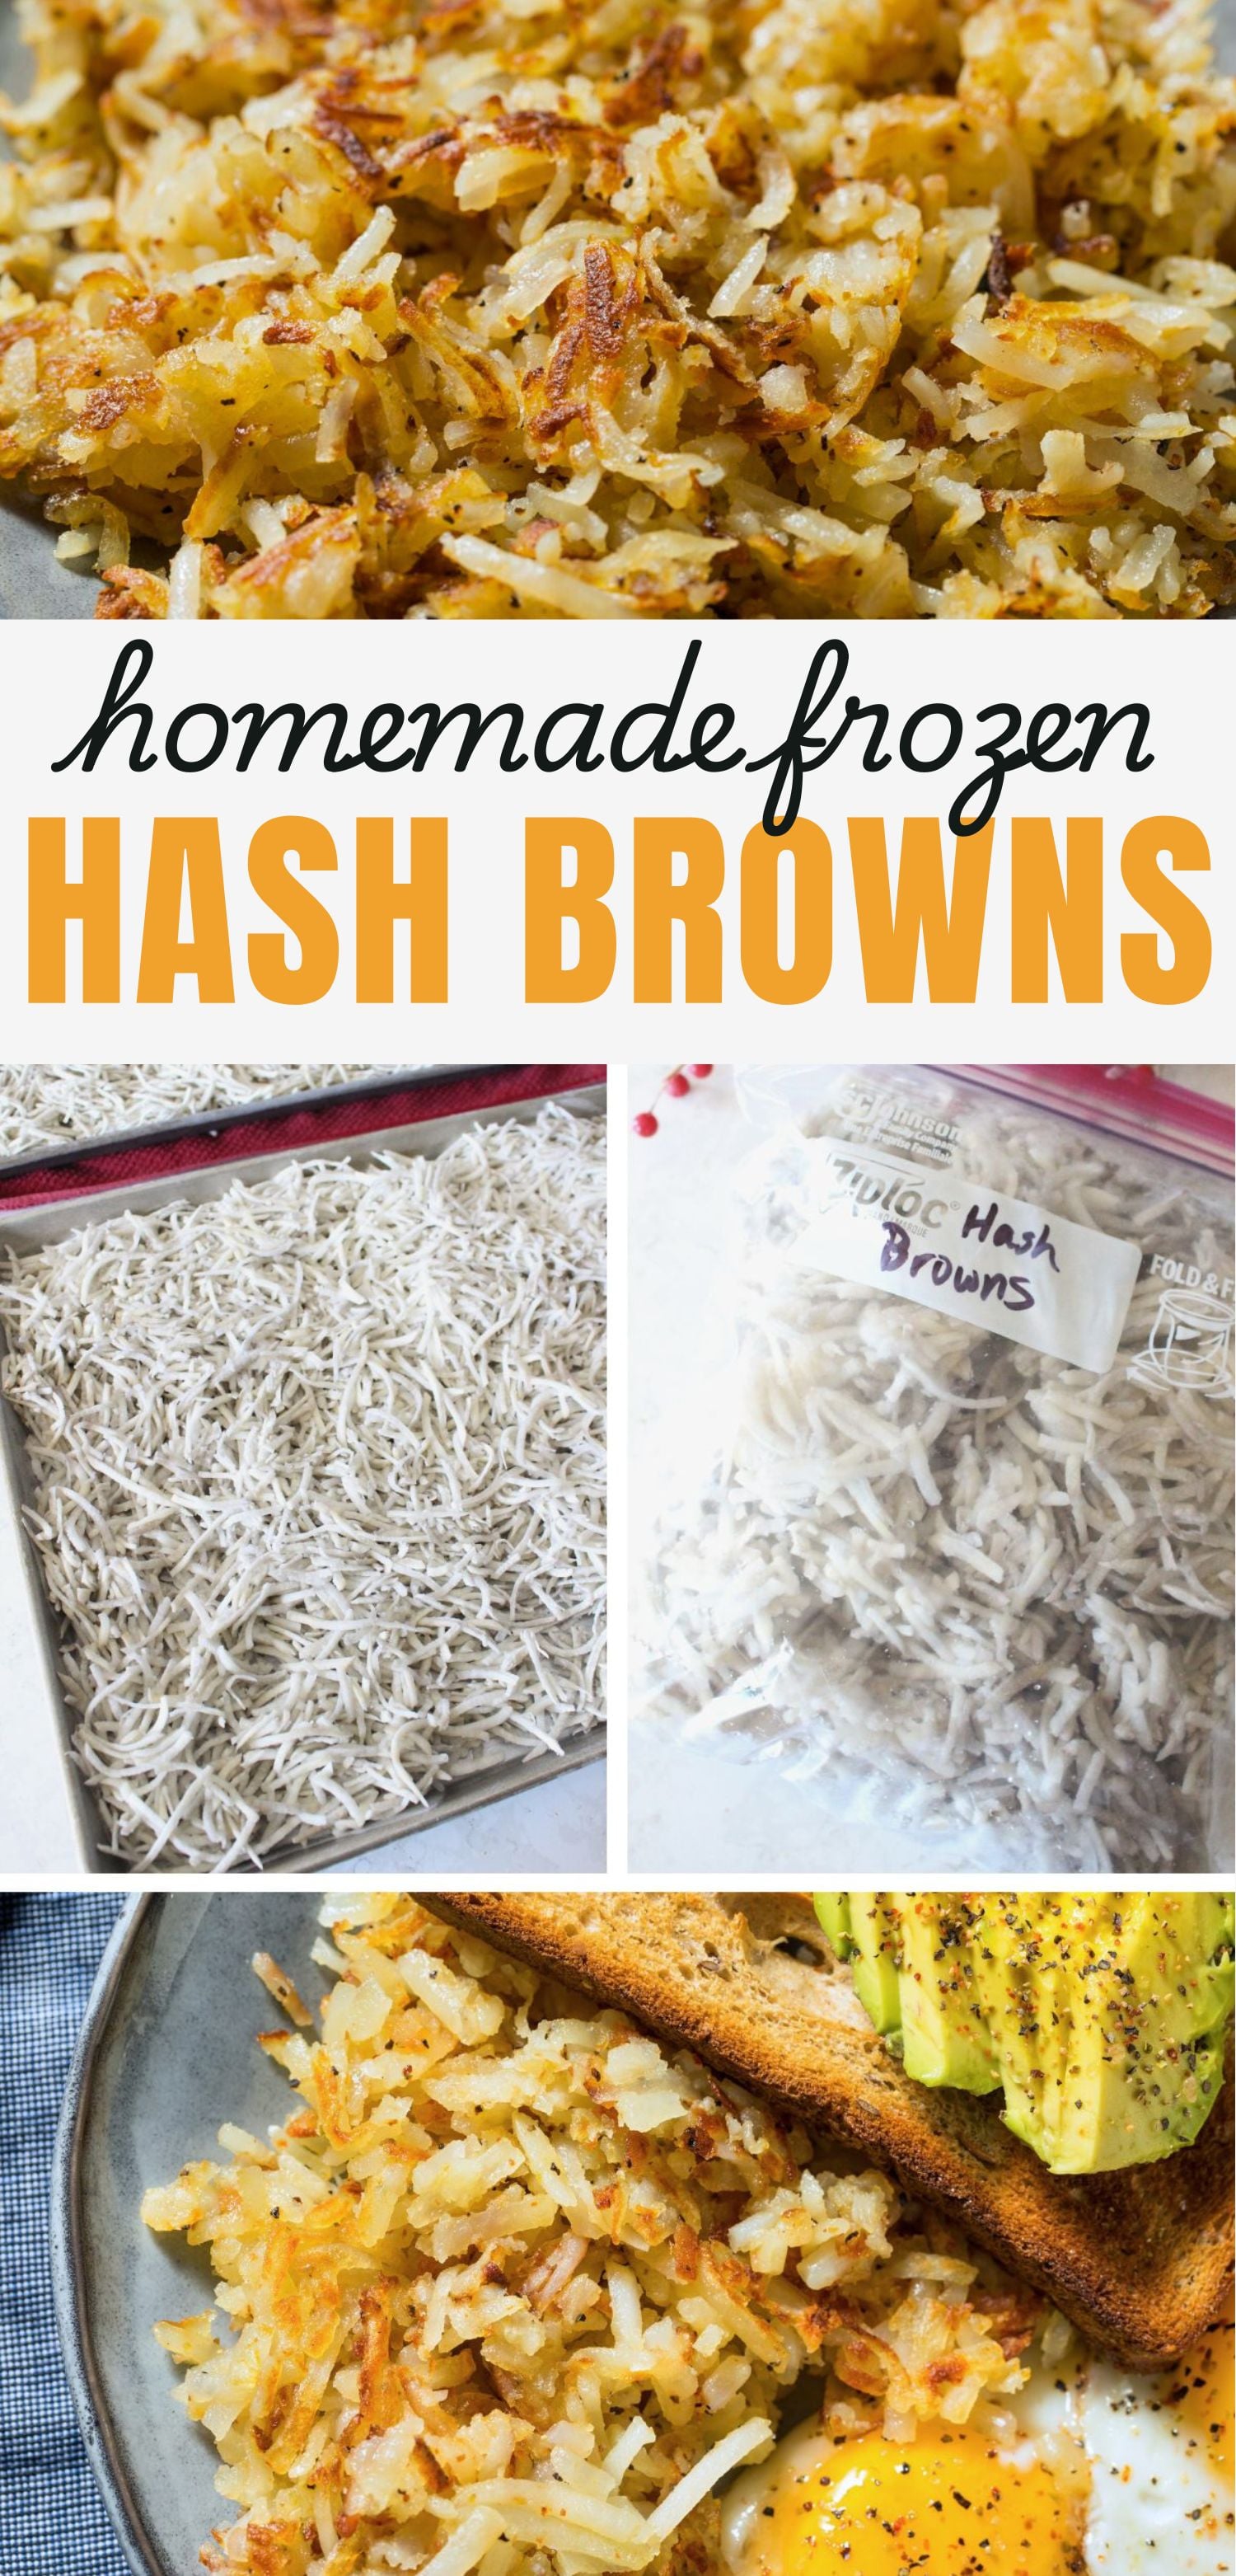
Homemade Frozen Hash Browns
Whether you have 2 pounds of fresh potatoes or 50, these hash browns are quick to make and even quicker to eat! Last time I processed a batch, I used 20 pounds of potatoes, and they were gone way too fast!
Be sure to check your freezer space before you commit to a certain number of potatoes. Each gallon bag can hold about 4 pounds of potatoes once shredded!

Instructions
Since the only ingredient in this recipe is *potatoes*, I’m not going to break down an ingredients list like I normally do. However, let’s go over the process for freezing and cooking the hash browns separately.
- Prep – Wash and peel the potatoes fully. You can do this by hand, or if you have an apple peeler, you can use that instead! Note: Not all apple peelers are long enough for potatoes, but the peeler I have is and it’s all metal too!
- Shred – This is easiest with a food processor with a shredding attachment, especially if you’re doing a large number of potatoes. However, you can do 2-5 pounds pretty easily with a cheese grater if needed!
- Soak – Fill the biggest bowl or pot you have about halfway up with cool water. As you shred the potatoes, place them in the pot of water right away. This will help remove the starch from the potatoes. Soak in batches for about 20 minutes.
- Blanch – Bring another pot of water to a gentle boil and transfer the potatoes from the pot of cool water directly into the pot of simmering water. Prep a bowl of ice water while the potatoes blanch for 2 minutes. The water doesn’t need to return to a boil, just count 2 minutes from the time you put them in the pot. Transfer the potatoes to the cold water bowl for about 30 seconds.
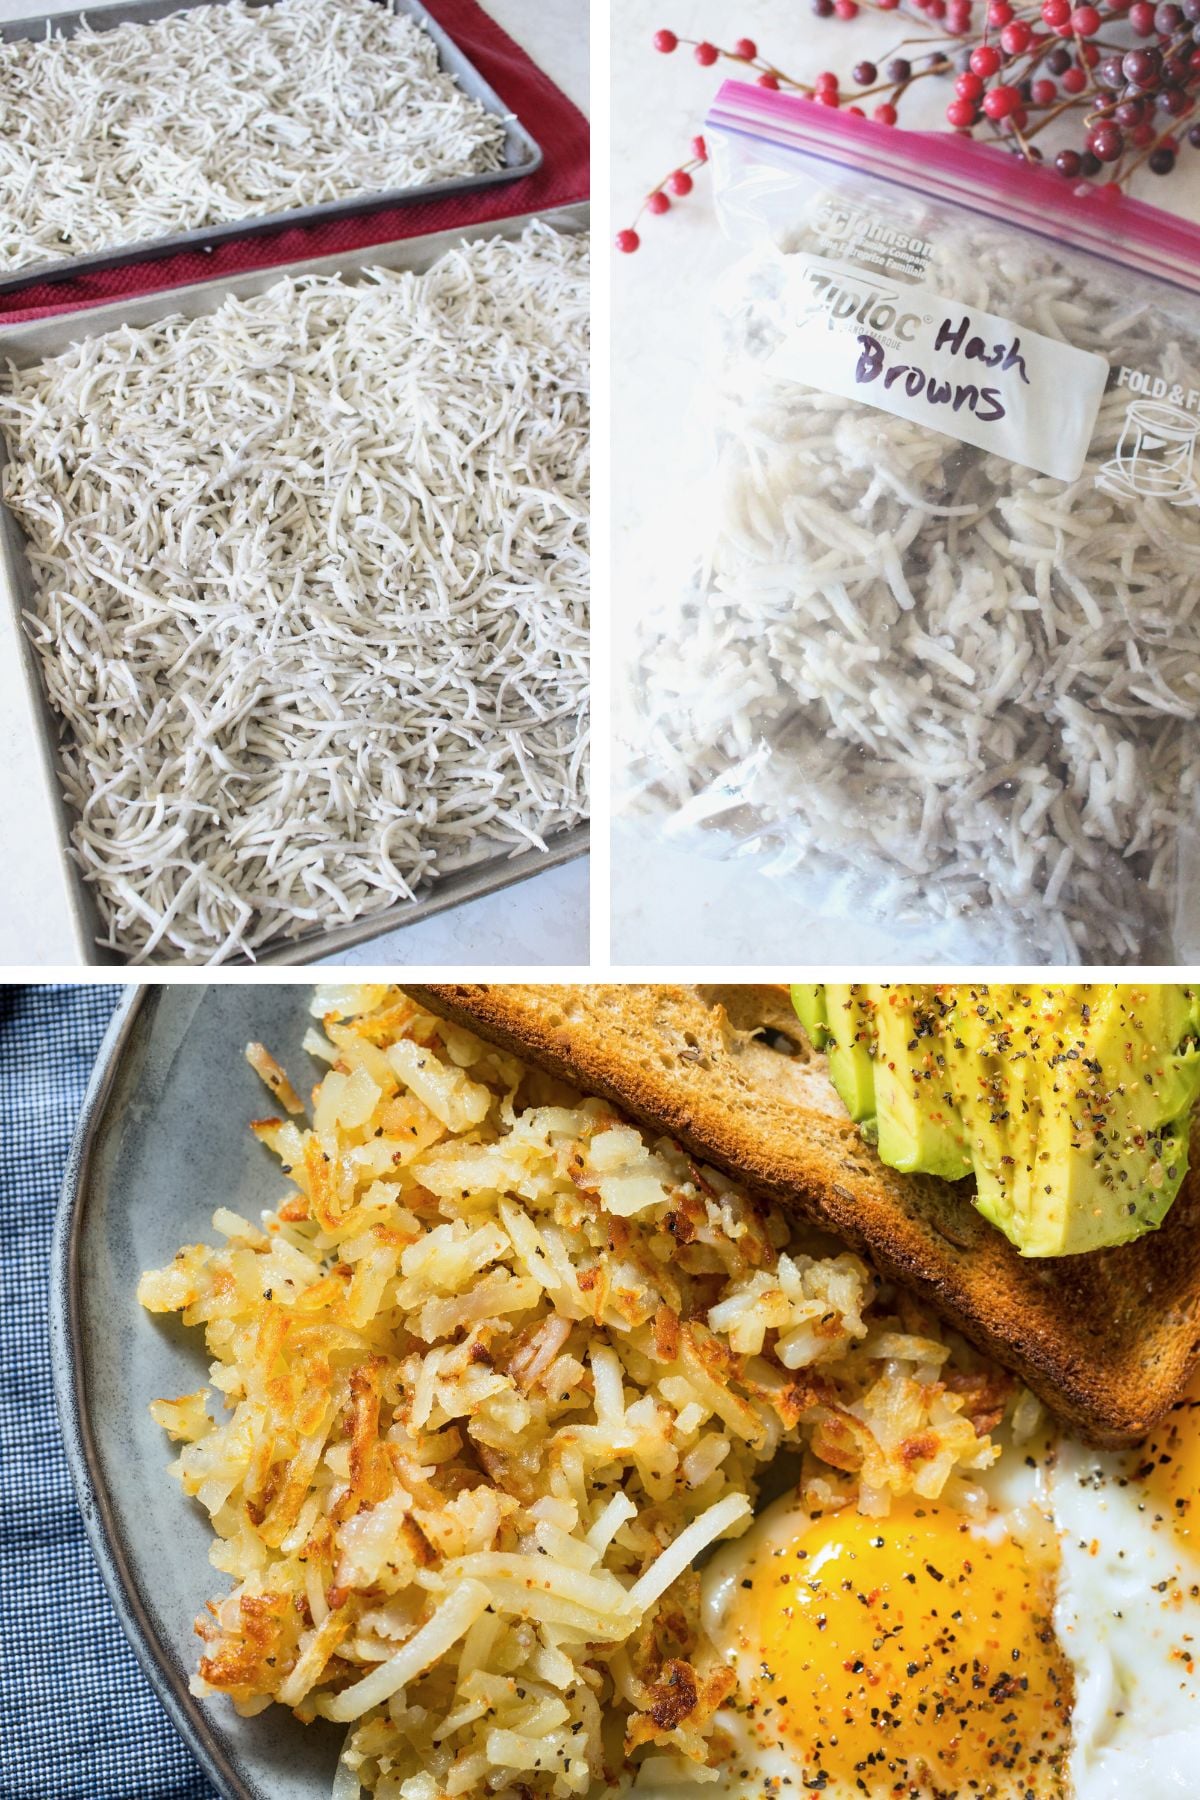
- Drain – Remove the hash browns from the cold water and place them on a towel-lined tray in a thin layer. Roll the towel up with the hash browns inside and gently squeeze. Not too much, as you don’t want to mash them! Just enough to remove the excess water.
- Freeze – On a dry baking tray, place the blanched and dried shreds in a thin layer, making sure to break them apart a bit, and immediately put them in the freezer. Once frozen solid, you can break them apart again and store them in gallon bags for up to 6 months!
Tray Prep for Freezing
You can put down wax or parchment paper, but I have found the potatoes much more likely to stick to that than the tray alone. Just grab a metal spatula and break a corner loose, and from there it is very easy to get them off the tray!
Cooking Your Frozen Hash Browns
If you are including your hash browns in a recipe, like this egg, bacon, and cheese hashbrown casserole, you can do that as normal without any changes for the fact that these are homemade. However, if you want to cook skillet hash browns and you’ve never done it before, here are the simple steps!
Depending on your skillet size and desired serving size, one skillet will be between 2 and 6 servings of hash browns when cooked in the following method.
- Heat – Bring a skillet to medium-high heat and add about 2 tablespoons of your preferred fat. We like to use butter or tallow most of the time.
- Add – Take the hash browns straight from the freezer and put them in a thin layer covering the entire bottom of the skillet. Too many and they won’t cook well, and may even turn gray!
- Fry – Cook for 5 minutes without moving the potatoes. Flip once and leave to cook for another 3-5 minutes. The potatoes should be crispy on the outside and soft in the middle!
- Enjoy – Salt and pepper to taste, serve with your favorite breakfast foods, and enjoy!
More Easy Breakfast Foods for the Freezer
Homemade Frozen Hash Browns
Equipment
- 1 Food Processor (optional) or Cheese Grater
- 1 Apple Peeler (optional) or Potato Peeler
Ingredients
- Potatoes (amount will vary)
Instructions
To Make Frozen Hash Browns
- Wash and peel the potatoes fully. You can do this by hand, or if you have an apple peeler, you can use that instead! Note: Not all apple peelers are long enough for potatoes, but the peeler I have is and it’s all metal too!
- This is easiest with a food processor with a shredding attachment, especially if you’re doing a large number of potatoes. However, you can do 2-5 pounds pretty easily with a cheese grater if needed!
- Fill the biggest bowl or pot you have about halfway up with cool water. As you shred the potatoes, place them in the pot of water right away. This will help remove the starch from the potatoes. Soak in batches for about 20 minutes.
- Bring another pot of water to a gentle boil and transfer the potatoes from the pot of cool water directly into the pot of simmering water. Prep a bowl of ice water while the potatoes blanch for 2 minutes. The water doesn’t need to return to a boil, just count 2 minutes from the time you put them in the pot. Transfer the potatoes to the cold water bowl for about 30 seconds.
- Remove the hash browns from the cold water and place them on a towel-lined tray in a thin layer. Roll the towel up with the hash browns inside and gently squeeze. Not too much, as you don’t want to mash them! Just enough to remove the excess water.
- On a dry baking tray, place the blanched and dried shreds in a thin layer, making sure to break them apart a bit, and immediately put them in the freezer. Once frozen solid, you can break them apart again and store them in gallon bags for up to 6 months!
To Cook Frozen Hash Browns
- Bring a skillet to medium-high heat and add about 2 tablespoons of your preferred fat. We like to use butter or tallow most of the time.
- Take the hash browns straight from the freezer and put them in a thin layer covering the entire bottom of the skillet. Too many and they won’t cook well, and may even turn gray!
- Cook for 5 minutes without moving the potatoes. Flip once and leave to cook for another 3-5 minutes. The potatoes should be crispy on the outside and soft in the middle!
- Salt and pepper to tastes, serve with your favorite breakfast foods and enjoy!
Notes
Tray Prep for Freezing
You can put down wax or parchment paper, but I have found the potatoes much more likely to stick to that than the tray alone. Just grab a metal spatula and break a corner loose, and from there it is very easy to get them off the tray!Pin this for Later!
Leave a Reply