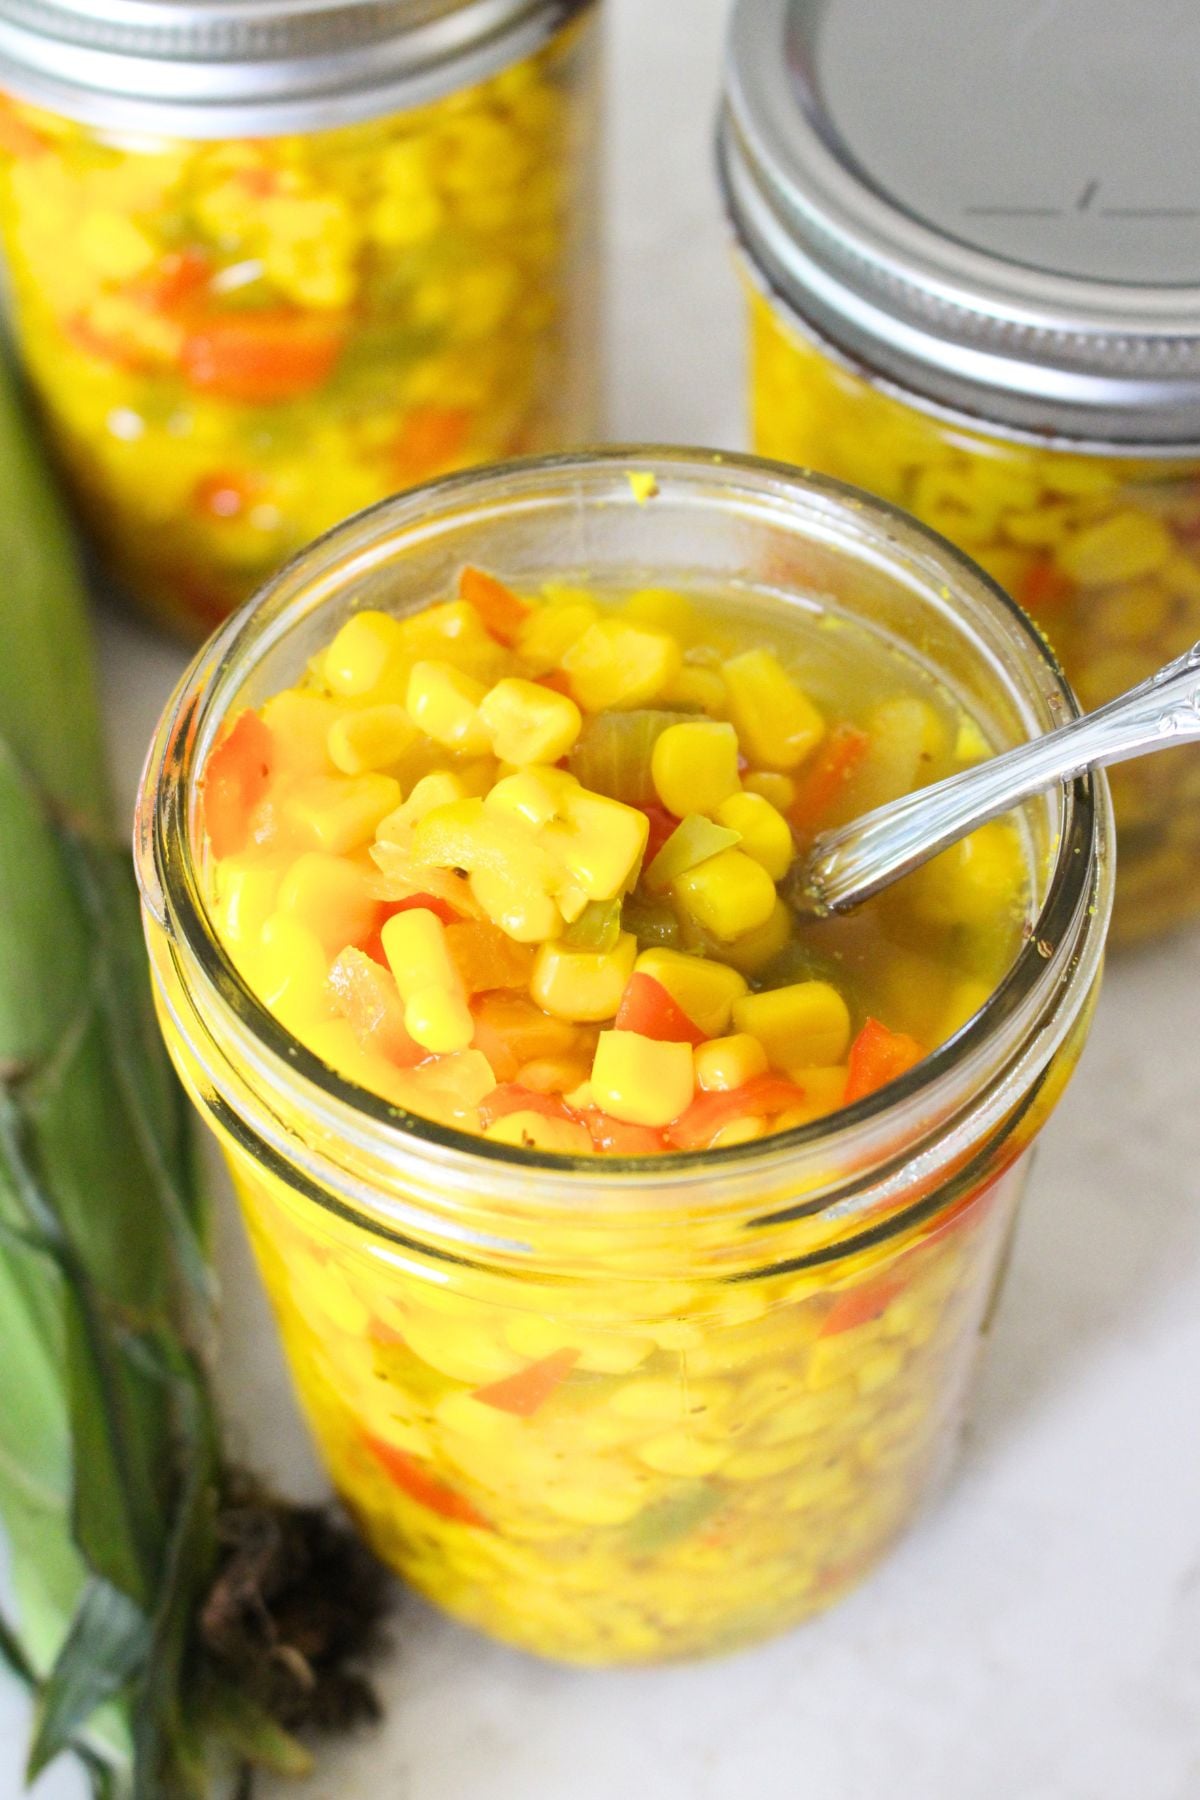
This sweet corn relish is the perfect summertime recipe that lets you enjoy corn at its peak year-round! Sweet, tangy, and packed with flavor, it is delicious on hot dogs, burgers, grilled chicken, and so much more! It’s a small-batch canning recipe, so you don’t need much corn to get started, or you can just make a batch for a party!
Corn is a must-grow for us every year. From canning corn for homemade vegetable soup to drying and milling corn for our homemade cornbread recipe, we love having this staple on hand!
One thing I’m adding to the rotation this year is sweet corn relish!
Here’s how we love to use this relish!
- Piled high on top of hot dogs
- Mixed with black beans to make a tortilla chip dip (my favorite!)
- Forked over pulled pork sandwiches
The possibilities are wide though, those are just a few of our favorite methods for enjoying this relish!
Small Batch Corn Relish Recipe
Most corn relish recipes call for canning, and while you certainly can can this recipe, you can also make it fresh for a party!
If you are canning, one thing I love about this recipe is that it doesn’t require any special equipment. All you need is a large pot for water bath canning! Plus, it’s perfect for any leftover corn that’s not enough for a full batch of pressure-canned corn. It yields 3 pints, but can be doubled if you want to make a full canner load of this recipe alone!
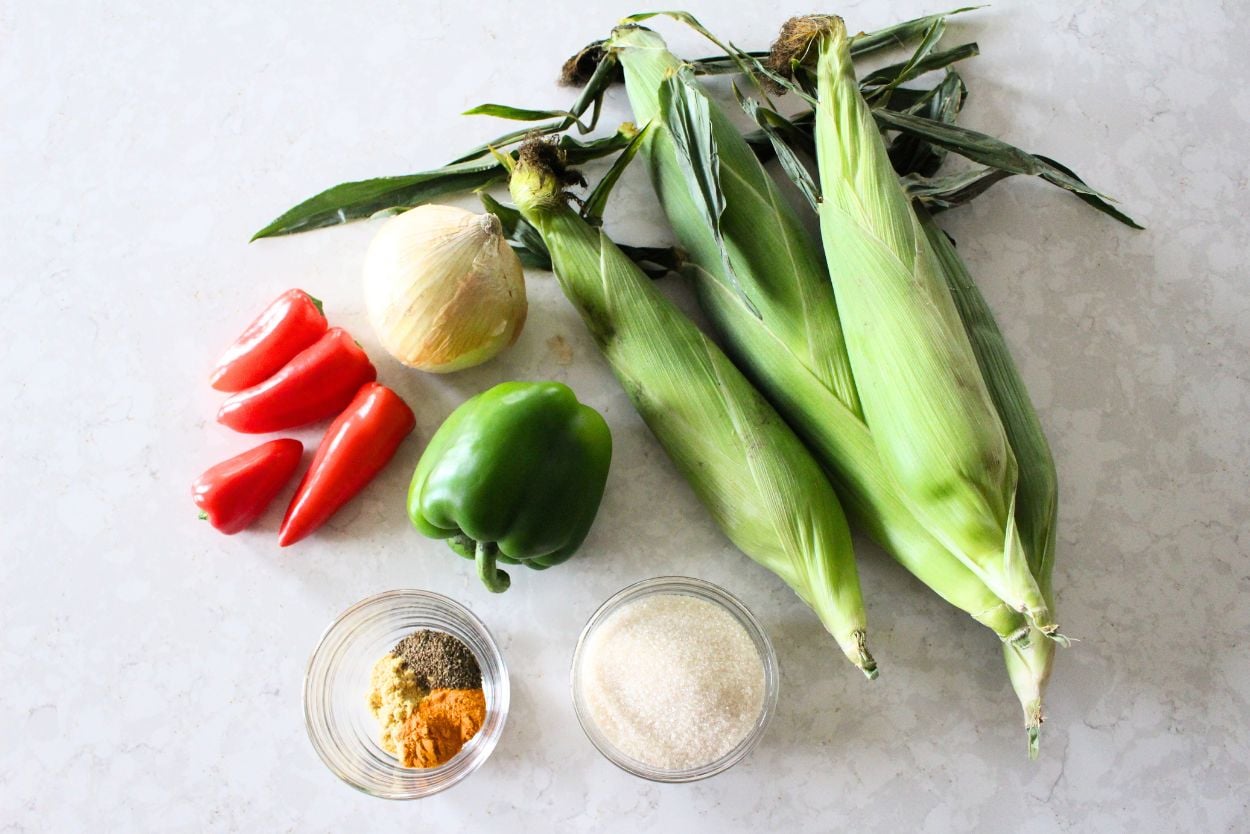
Ingredients
This classic summer relish is a great way to use your fresh produce! Ready in just about 30 minutes (plus chill time), it’s perfect for grilling season, parties, or to have on the pantry shelf all year! I’m breaking down each ingredient, so you know why each one is called for, plus a few substitution options. Full printable recipe with measurements can be found at the end of the post!
- White Vinegar – Since this is a pickled recipe, this is crucial for taste and safe canning! Do not sub any other type of vinegar. Look for a white vinegar with a 5% acidity, as there are different strengths available.
- Sugar – White sugar works best here, as other types do not properly raise the pH levels for canning. If you are just making this to enjoy fresh, feel free to experiment with other sugar types!
- Salt – Any sea salt works best, avoid table salt if possible.
- Corn – You can use fresh or frozen corn for this recipe, but don’t use pre-canned corn!
- Bell Peppers – I like to use a mix of red and green bell peppers for a nice-looking relish, but you can use what you have. You can also use any other types of peppers you have on hand, if you like more heat!
- Onion – White or yellow onion will work well. Avoid red onion, as the taste will be very different!
- Spices – A mix of mustard, celery seeds, and turmeric is all you need for this recipe! You can skip the turmeric if you want. While it does add some flavor, it mostly adds a nice vibrant color to the cooked relish.
Instructions
These directions include the information for canning the corn relish as well. However, if you just want to enjoy this for a party, you can simply follow steps 1 and 3 (skip 2!), chill the relish, and enjoy!
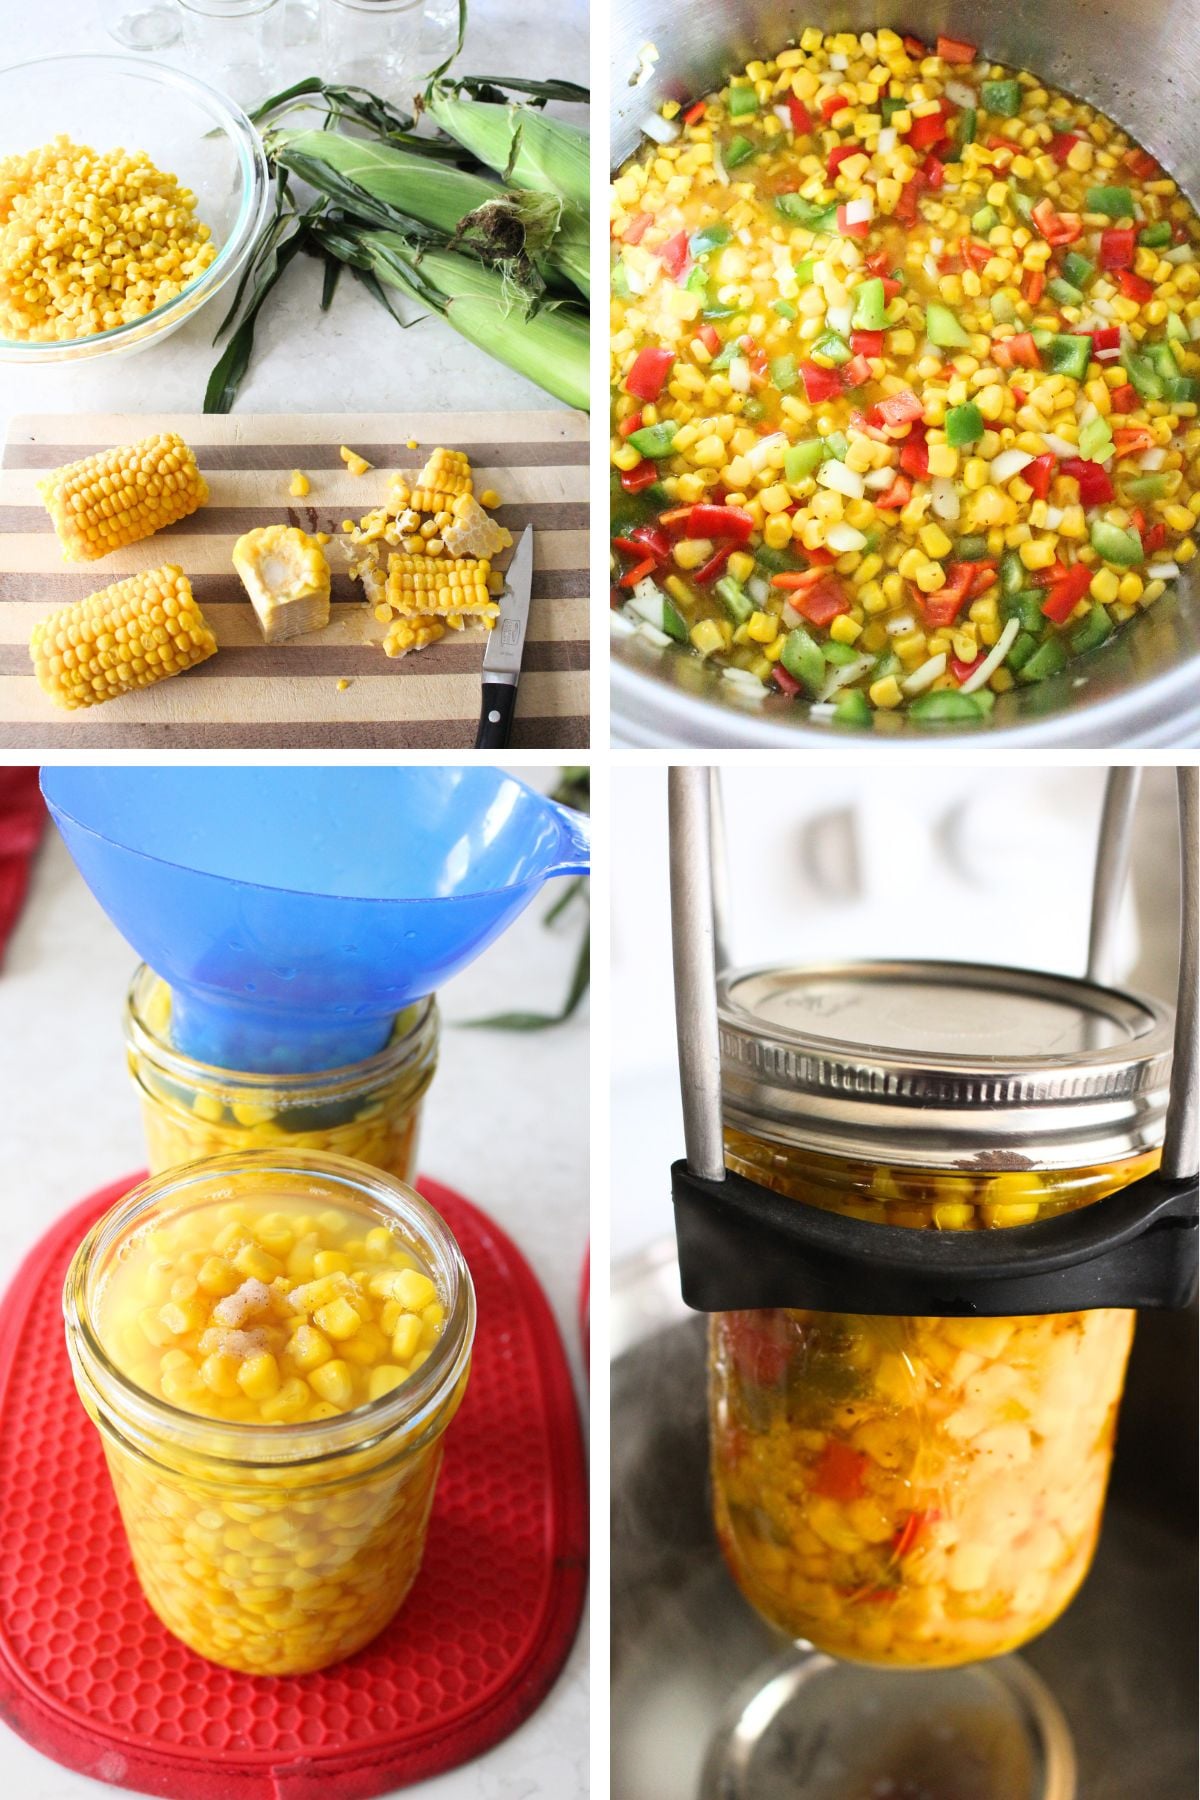
- Prep – Cut corn kernels off the cob and set aside. Peel the onion and remove the stems and seeds from the bell peppers. Dice the onion and bell peppers into roughly equal, small pieces.
- Heat – Prepare a large pot to act as a boiling water canner. Fill the pot about halfway with water and bring to almost boiling, but don’t let it actually boil yet. Heat the jars in simmering water until ready to fill. Wash the lids in warm, soapy water and set bands aside.
- Simmer – Combine the vinegar, sugar, and salt in a large saucepan. Bring to a boil, stirring to dissolve sugar. Add corn, red and green peppers, onion, mustard, celery seeds, and turmeric. Reduce the heat and simmer for 15 minutes. Stir frequently to avoid scorching.
- Fill – Remove the jars from the hot water and drain well. Ladle hot relish into a hot jar, leaving a 1/2 inch headspace. Remove the air bubbles with a plastic canning knife and wipe the jar rim with a clean, wet towel. Fit the lid and band onto each jar and adjust to fingertip tightness. Repeat until all jars are filled and lidded.
- Process – Water must cover jars by at least 1 inch. Adjust the heat to medium-high and bring the water to a rolling boil. Start the timer once the water is boiling. Process half-pint jars 15 minutes, or pint jars for 20 minutes, adjusting for altitude if above 1000’ (see chart).
- Remove – Turn off the heat and let the jars rest in the water for 5 minutes before removing and placing on a folded towel. Do not retighten bands if they are loose.
- Rest – Let the jars cool for 12-24 hours without moving. Check lids for a good seal, they should not flex when the center is pressed. Store once all seals are confirmed.
Even More Summer Canning Recipes
Here are a few more easy, water bath canning recipes to try next!
- Homemade Peach Jam
- The BEST Homemade Sweet Gherkins
- Roasted Tomato Sauce (We use this for everything!)
Small Batch Corn Relish Recipe
Ingredients
- 2 cups white vinegar 5% acidity
- ⅔ cup sugar
- 1 Tbsp salt
- 4 ½ cups corn kernels
- 2 cups diced mixed red and green bell peppers
- ½ cup finely chopped onion
- 1 Tbsp dry mustard
- 1 tsp celery seeds
- 1 tsp ground turmeric
Instructions
- Prep – Cut corn kernels off the cob and set aside. Peel the onion and remove the stems and seeds from the bell peppers. Dice the onion and bell peppers into roughly equal, small pieces.
- Heat – Prepare a large pot to act as a boiling water canner. Fill the pot about halfway with water and bring to almost boiling, but don’t let it actually boil yet. Heat the jars in simmering water until ready to fill. Wash the lids in warm, soapy water and set bands aside.
- Simmer – Combine the vinegar, sugar, and salt in a large saucepan. Bring to a boil, stirring to dissolve sugar. Add corn, red and green peppers, onion, mustard, celery seeds, and turmeric. Reduce the heat and simmer for 15 minutes. Stir frequently to avoid scorching.
- Fill – Remove the jars from the hot water and drain well. Ladle hot relish into a hot jar, leaving a 1/2 inch headspace. Remove the air bubbles with a plastic canning knife and wipe the jar rim with a clean, wet towel. Fit the lid and band onto each jar and adjust to fingertip tightness. Repeat until all jars are filled and lidded.
- Process – Water must cover jars by at least 1 inch. Adjust the heat to medium-high and bring the water to a rolling boil. Start the timer once the water is boiling. Process half-pint jars 15 minutes, or pint jars for 20 minutes, adjusting for altitude if above 1000’ (see chart).
- Remove – Turn off the heat and let the jars rest in the water for 5 minutes before removing and placing on a folded towel. Do not retighten bands if they are loose.
- Rest – Let the jars cool for 12-24 hours without moving. Check lids for a good seal, they should not flex when the center is pressed. Store once all seals are confirmed.
Notes
Ingredients
I’m breaking down each ingredient here, so you know why each one is called for, plus a few substitution options.- White Vinegar – Since this is a pickled recipe, this is crucial for taste and safe canning! Do not sub any other type of vinegar. Look for a white vinegar with a 5% acidity, as there are different strengths available.
- Sugar – White sugar works best here, as other types do not properly raise the pH levels for canning. If you are just making this to enjoy fresh, feel free to experiment with other sugar types!
- Salt – Any sea salt works best, avoid table salt if possible.
- Corn – You can use fresh or frozen corn for this recipe, but don’t use pre-canned corn!
- Bell Peppers – I like to use a mix of red and green bell peppers for a nice-looking relish, but you can use what you have. You can also use any other types of peppers you have on hand, if you like more heat!
- Onion – White or yellow onion will work well. Avoid red onion, as the taste will be very different!
- Spices – A mix of mustard, celery seeds, and turmeric is all you need for this recipe! You can skip the turmeric if you want. While it does add some flavor, it mostly adds a nice vibrant color to the cooked relish.
Nutrition
Pin this for Later
Leave a Reply